REVIEW · PARIS
Paris Photography Masterclass – Private Photography Lesson
Book on Viator →Operated by Aperture Tours · Bookable on Viator
Paris turns into a camera workshop. Iconic sights plus real-time instruction is the point. This private Paris Photography Masterclass pairs a local guide with a professional photographer so you can learn composition and camera settings while you’re actually walking around the city, from Notre-Dame to the Louvre pyramid, then out to the Eiffel Tower and Place de la Concorde.
What I like most is that the coaching feels personal, not canned. You’ll get feedback on what you’re trying to shoot, and the instructor team includes photographers such as Clara, Michiru, William, Federica, and Alexander (names that show up repeatedly in strong reviews). One thing to watch: you’ll need to bring your own DSLR camera, and a tripod is only available on request, so low-light long-exposure shots depend on what you ask for and what your camera can do.
In This Review
- Key takeaways before you book
- Why this private Paris photography lesson feels different
- The Pont Marie meetup: how the first hour sets you up
- Notre-Dame de Paris stop: photographing a subject that’s too big
- Louvre Museum courtyards and the pyramid: using geometry like a cheat code
- Eiffel Tower over the Seine: the shot that teaches patience
- Place de la Concorde: wide Paris frames and easy-to-miss details
- Coaching style: from beginners to people shooting manual
- What to bring: DSLR, optional tripod, and the camera you’ll actually use
- Timing choices and why early evening can matter
- Walking pace and city logistics (it’s part of the lesson)
- Value check: is $205.59 worth three hours?
- Who this Paris masterclass suits best
- Should you book this Paris Photography Masterclass?
- FAQ
- How long is the Paris Photography Masterclass?
- Where does the tour start and end?
- Is admission included for the main landmarks?
- Do I need to bring my own camera?
- What group size is this private lesson?
- Does the tour run in bad weather?
Key takeaways before you book
- Private coaching, max 4 people means you’re not stuck copying someone else’s angles.
- A built-in photo route covers Notre-Dame, the Louvre, the Eiffel Tower, and Place de la Concorde in about three hours.
- Multiple departure times (morning through early evening) help you choose your lighting mood.
- Free admission tickets are included for the key sights on the route.
- Tripod support is on request, useful for long exposures if your timing works.
- You can still get value with a phone if you bring one that lets you control exposure (one review highlighted iPhone 15 Pro Max settings help).
Why this private Paris photography lesson feels different
Most Paris tours show you sights. This one uses sights as your classroom. You walk, you frame, you shoot, then you adjust based on what the photographer tells you to change.
The “private” part matters. With a max of four people per booking, the guide can actually notice what you’re doing—your shutter speed, your exposure issues, your framing problems—and give corrections in the moment. That’s how you go from taking random photos to taking photos with a plan.
Also, this is a walking route with stops that are photo-friendly. Notre-Dame is big and dramatic. The Louvre has strong geometry. The Eiffel Tower gives you layered views over the Seine. Place de la Concorde lets you practice wider context shots. Each location is a different lesson.
You can also read our reviews of more private tours in Paris
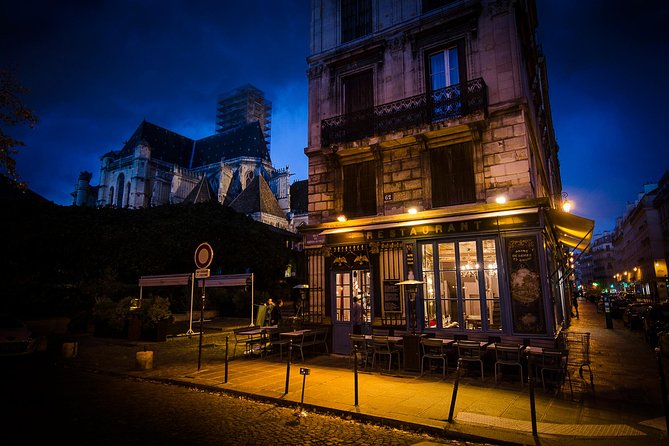
The Pont Marie meetup: how the first hour sets you up
You start at 3 Pont Marie (75004), and you’ll end near Place de la Concorde (often around Concorde–Quai des Tuileries). The exact end point depends on your walking pace, but the rhythm is consistent: short time on each landmark, then direct shooting instruction.
That structure keeps the session from turning into a slow sightseeing slog. With about three hours total and roughly 30 minutes at each main stop, you’ll have enough time to try a few angles and practice what you were just taught. It’s also a smart way to avoid the common problem of arriving at a viewpoint and freezing while you figure out your camera.
If you’re nervous about being “bad at photography,” this format helps. You’re not standing around for long lectures. You’re shooting, then correcting quickly—often the fastest way to learn.
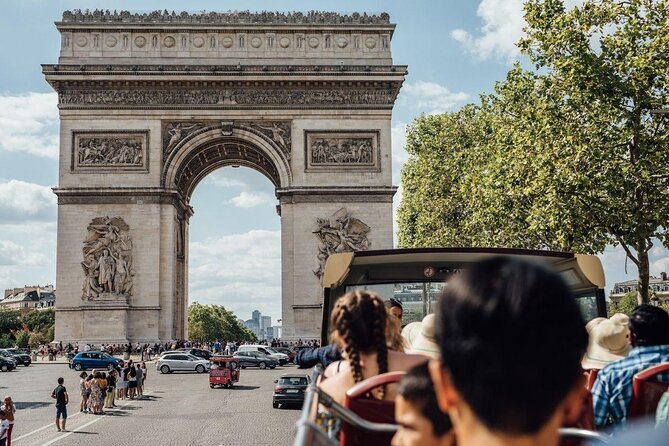
Notre-Dame de Paris stop: photographing a subject that’s too big
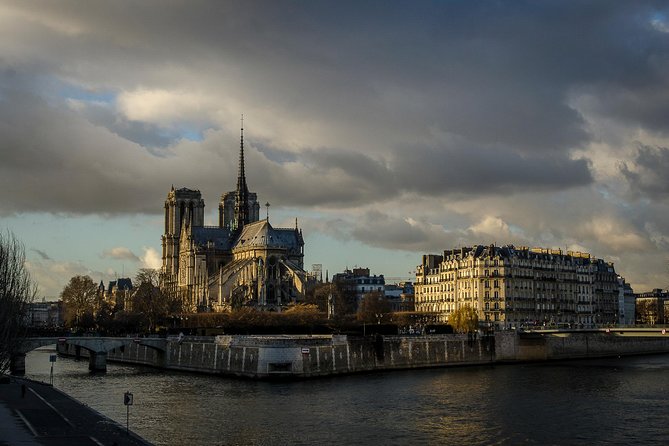
Your first landmark time is around Notre-Dame de Paris, with about 30 minutes. You get the kind of view that makes you understand why photographers obsess over perspective. The cathedral is massive, and your first instinct is often to zoom out too much or aim straight-on.
Here’s what this stop is good for, lesson-wise:
- practicing framing so the building doesn’t swallow your image
- learning foreground/background balance so you’re not just capturing stone
- trying both symmetry and “slightly off” compositions to see what feels more dynamic
Admission here is listed as free, which is a nice bonus because it keeps you focused on shooting instead of tickets and lines. Also, the cathedral’s surfaces give you lots of texture. Even if lighting is tricky, you can still practice exposure control and contrast handling.
Possible consideration: Notre-Dame is popular. Even if your instruction helps you pick better angles, you’ll still be in a high-visibility area. If you want a quiet, solo-photographer mood, you might find the location lively even during your lesson.
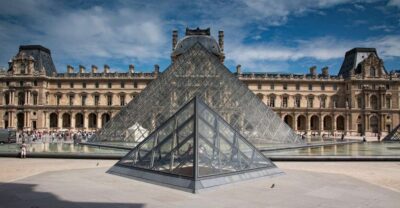
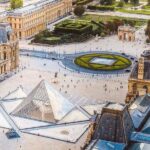
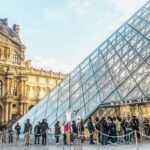
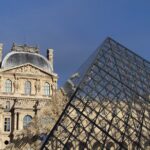
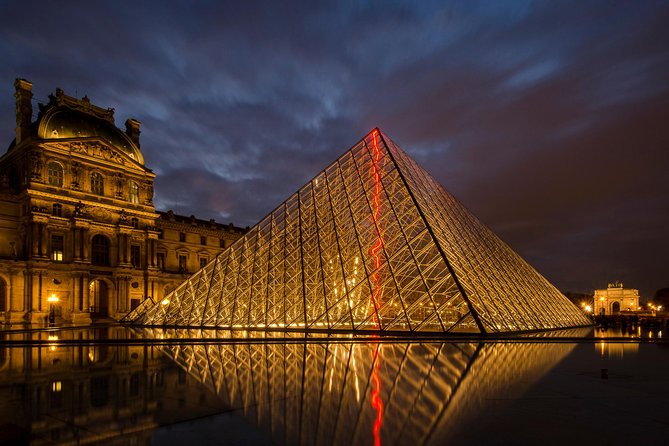
Louvre Museum courtyards and the pyramid: using geometry like a cheat code
Next is the Louvre Museum, again with about 30 minutes. You’ll aim at the courtyards and the pyramid, which are basically photo gear for geometry lovers. The pyramid gives you clean lines. The courtyards let you practice depth—how to show “distance” in a flat frame.
This stop is perfect for sharpening your composition habits:
- deciding where the lines lead your eye
- choosing a viewpoint that makes the pyramid feel intentional, not random
- checking your horizon so verticals don’t lean (a common problem when shooting tall architecture)
Admission is also listed as free here. That’s another practical win because it means you’re paying for instruction, not entry fees. And since this is a walking masterclass, you’re likely to have more time on the camera than you would on a typical museum-focused outing.
One more practical note: because the Louvre is more complex than just one viewpoint, your photographer guide’s job is to steer you to angles you might not try on your own. Multiple reviews praise guides who lead you to places you might otherwise miss, which is exactly what helps here.
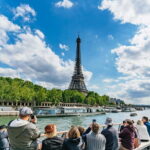
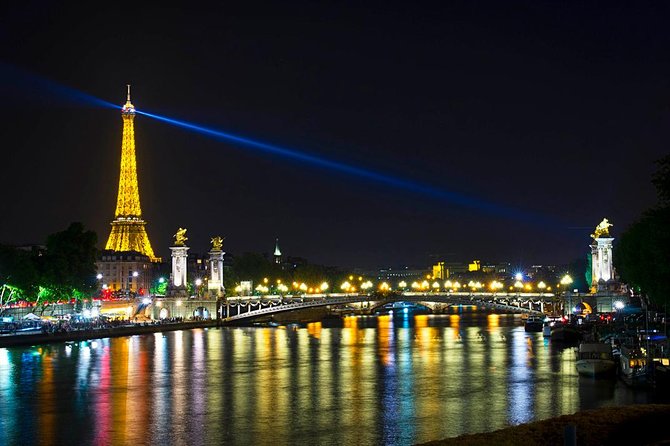
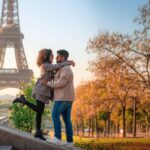
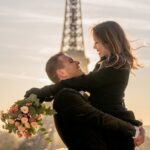
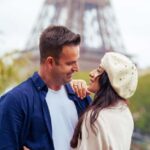
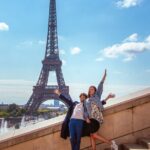
Eiffel Tower over the Seine: the shot that teaches patience
Then it’s on to the Eiffel Tower, again around 30 minutes, photographing it with the Seine in view. This is where Paris photography gets real. The Eiffel Tower is iconic, but it also comes with classic challenges: changing light, reflections, and crowds.
This stop is valuable because it forces you to work with layers:
- the tower itself
- water reflections and texture
- sky and light direction
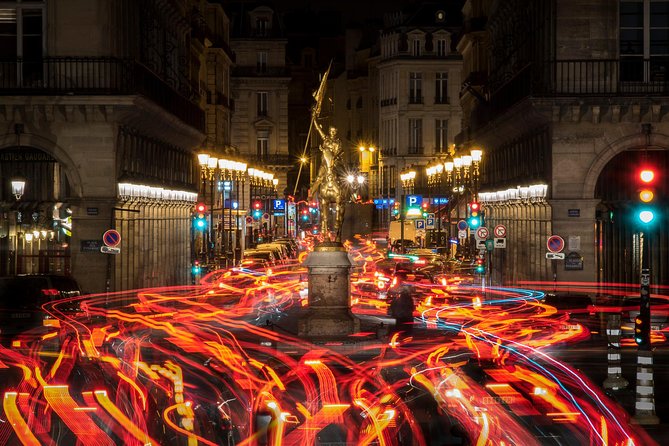
If your departure time puts you near dusk (early evening is an option), you’ll also get practical advice that maps to night photography. Several reviews mention strong instruction for low light—things like confidence using manual or aperture-priority modes, and learning how to compose with light instead of fighting it.
What you might not think about until you’re there: if you’re trying long exposure effects, you’ll benefit from a tripod. Tripods are available upon request, so if long exposures are your goal, ask ahead (or ask at the start of the lesson). One review specifically mentions long-exposure practice and tripod-based results.
You can also read our reviews of more photography tours in Paris

Place de la Concorde: wide Paris frames and easy-to-miss details
Your final stop is Place de la Concorde, roughly 30 minutes. You can photograph the Champs Elysees view or the fountains in the square. This part of the route is great for learning “city frame” thinking.
It’s also where you can practice the kind of shot that looks simple but takes skill:
- putting a huge monument or avenue into a frame without flattening it
- using foreground elements so the photo feels three-dimensional
- controlling exposure when you’re dealing with bright pavement and sky at the same time
Reviews include feedback about learning how to add foreground interest when photographing large buildings. That’s exactly the type of instruction that makes your Concorde shots feel more intentional.
Also, this area is a transition point—less “one landmark” and more “Paris as a whole.” If you’re trying to capture not just icons but the feeling of the city, this stop helps.
Coaching style: from beginners to people shooting manual
This masterclass is aimed at all levels—beginner to advanced. The important part isn’t “level.” It’s that the photographer guide can adjust the instruction to what you can do and what you want to improve.
In many top reviews, the common thread is patient, constructive feedback. Guides are described as clear and encouraging, with an emphasis on composition and how to use light. One highlight that pops up: people leaving feeling confident with camera settings and knowing how to set up each shot rather than hoping the camera does the thinking for them.
If you want something tangible to look for during your session, pay attention to these teaching moments:
- when the guide asks what you’re trying to capture (your goal matters)
- when they correct framing before you waste shots
- when they explain settings in plain language (not just technical jargon)
- when they push you to try manual or aperture priority after you’ve got a handle on exposure basics
One review even mentioned a participant using an iPhone 15 Pro Max and getting help using native app features to manage exposure beyond automatic settings. So if you’re not carrying a DSLR, you might still walk away with better control—just keep expectations realistic.
What to bring: DSLR, optional tripod, and the camera you’ll actually use
Here’s the deal with gear. The experience asks you to bring your own DSLR camera. That doesn’t mean your phone can’t be useful, but the core instruction is clearly designed around DSLR handling.
You may want to bring:
- your DSLR (with charged batteries)
- a lens you’re comfortable with for architecture shots
- any basics like spare memory cards
Tripod availability is on request, so decide if you need it before you go. If you’re interested in long exposure effects, that’s where the tripod becomes a game-changer.
Also note: the tour includes photography instruction, but camera is not included, and transportation to/from attractions is not included either. Plan to get yourself to the meeting point and to walk between stops as part of the experience.
Timing choices and why early evening can matter
The schedule allows multiple departure times from morning until early evening. That choice changes the feel of your photos more than you might expect.
- Morning: often easier for balanced exposure and clearer detail, but you’ll be at well-lit landmarks.
- Early evening: often more mood, and better timing for practicing low-light techniques if the light drops during your session.
Some reviews specifically mention night photography outcomes and low-light confidence. Even if you book an earlier start, you can still learn lighting skills you’ll use later in the day. The key is that the guidance focuses on exposure and how to set up shots, which transfers across lighting conditions.
Weather matters too. The tour operates in all weather, so bring a jacket and plan for damp pavement. One review described making the best of rain and still getting valuable learning. If you hate walking in bad weather, be honest about that before booking.
Walking pace and city logistics (it’s part of the lesson)
Because the route is built around walking, you’re moving through different micro-environments fast. That’s not a flaw—it’s how you practice. You can’t just test one composition and then go home. You learn to keep working while the city shifts around you.
Still, it does mean:
- you’ll want comfortable shoes
- you may need to manage time at each stop carefully
- if the group pace is brisk, the photographer’s instruction helps you not get lost while shooting
Public transportation is nearby, which helps if you want to tack on a pre- or post-activity (for example, a dinner plan near your end point). The tour end varies, but it’s typically near Place de la Concorde, which is handy for continuing your evening in the central area.
Value check: is $205.59 worth three hours?
At about $205.59 per person for roughly 3 hours, this isn’t the cheapest way to see Paris. But it also isn’t priced like a mass group bus tour.
The value comes from three areas:
- private format (max 4 people, only your group)
- professional photography instruction (not just someone explaining camera basics in passing)
- a tight route that includes major landmarks with free admission tickets listed for stops
If you’d normally pay for a generic walking tour plus separate photo advice, this can add up. And if photography is a real priority for you—especially if you want confidence with settings—this format can save time. You get direct feedback while you’re at the locations you actually want to photograph.
A possible drawback on value: if you already shoot confidently in manual and don’t need composition or lighting help, you might feel like you’re paying for refinement rather than a breakthrough. The best fit is when you want instruction you can apply immediately.
Who this Paris masterclass suits best
This experience is a strong match if:
- you want better photos at iconic places, not just sightseeing
- you want help making sense of composition and exposure
- you like learning by doing, with feedback in real time
- you’re traveling with someone who wants different levels of participation (some reviews note one person actively shooting while others chose not to)
It’s also a great solo option. Multiple reviews highlight solo travelers feeling the instruction was personal and focused.
If your goal is only a quick set of postcard shots with zero camera learning, you might find the lesson approach less satisfying. But if your goal is photos you understand and can repeat later, you’re in the right place.
Should you book this Paris Photography Masterclass?
If you’re serious about improving your photography in Paris—and you want a clear plan for where to shoot and what to practice—this is an easy yes. The combination of a short landmark route, free admission at the key stops, and patient, tailored feedback is exactly how you turn a trip into skills you’ll use long after you leave.
Book it especially if you:
- want help with manual or aperture priority
- care about composition and lighting more than camera brand fluff
- enjoy walking and shooting in small bursts
Skip it if you:
- don’t have a DSLR and aren’t comfortable using whatever camera you bring
- hate walking in weather
- only want a casual photo stroll with no instruction
If you do book it, pick your departure time based on your photo goal. Morning is clean and bright. Early evening is where you can practice mood and low-light thinking—two things that seem to land really well for people who leave impressed.
FAQ
How long is the Paris Photography Masterclass?
It’s about 3 hours.
Where does the tour start and end?
It starts at 3 Pont Marie, 75004 Paris, and typically ends near Place de la Concorde (near Concorde–Quai des Tuileries).
Is admission included for the main landmarks?
The stops listed for Notre-Dame de Paris and the Louvre Museum mention admission tickets as free.
Do I need to bring my own camera?
Yes. You’re asked to bring your own DSLR camera. A tripod is available upon request, but it’s not included automatically.
What group size is this private lesson?
It’s limited to a maximum of 4 people per booking, and only your group participates.
Does the tour run in bad weather?
Yes, it operates in all weather conditions, so you should dress appropriately.